Hidden Single Walkthrough
A Hidden Single is a digit that can legally go in only one cell of a row, column, or box, even though that cell still shows other candidates. The digit is forced into that single spot.
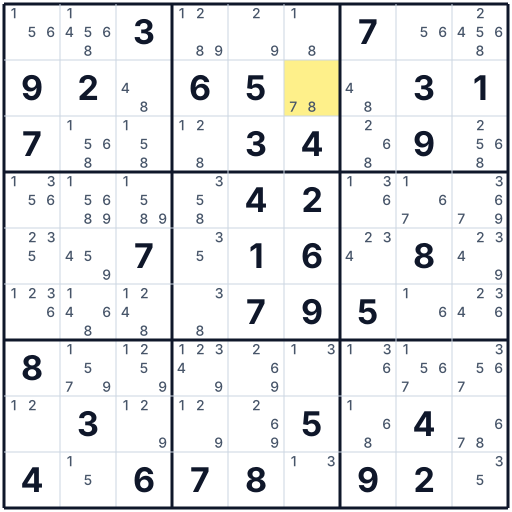
There is a Hidden Single in Row 2. Applying the Hidden Single places 1 digit (struck out in red below; any solved cells shown in green).
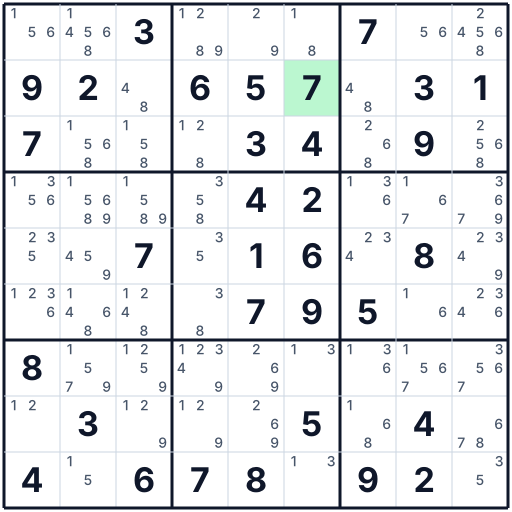
Reading this board
The pattern on this puzzle involves row 2. Work from the before-image above: find the hidden single for yourself before scrolling to the after-image, since the point of a worked example is the search, not the answer. No cell is solved outright by this move. The value is positional: 0 impossible candidates leave the grid, which is what makes the next round of scanning productive.
Why the deduction is valid
A Hidden Single reverses the question. Instead of asking what can go in this cell, you ask where this digit can go in this unit. Every row, column and box must contain all nine digits exactly once, so if a digit has been squeezed out of eight cells of a unit, the ninth cell is forced — regardless of how many other candidates that cell still shows. The candidate is "hidden" precisely because the cell looks undecided.
How to spot a Hidden Single on your own board
- Cross-hatch one digit at a time. Pick a digit, find every box that does not yet contain it, and draw imaginary lines through the rows and columns that already do. Boxes where only one cell survives are your placements.
- Prioritise digits that already appear five or six times on the grid. The more copies placed, the more lines they project, and the more likely they have squeezed themselves into a corner somewhere.
- Boxes are usually more productive than rows or columns, because a box is constrained by three rows and three columns at once.
Common mistakes
- Dismissing a cell because it has several candidates. That is exactly the condition that makes the single hidden — a cell with four pencil marks can still be the only home for a digit in its box.
- Cross-hatching a digit once and never returning to it. Every subsequent placement changes the picture, so a digit that yielded nothing on the first pass often yields immediately on the third.
What to do next
Hidden Singles and Naked Singles feed each other: the digit you just placed removes candidates elsewhere, frequently exposing a Naked Single a cell or two away. Alternate between the two questions — "what fits here" and "where does this go" — until neither produces anything.